
DIY Monitor Stand – Build a Custom Desk Riser
Elevate your screen, improve your posture, and reclaim desk space with a monitor stand you build yourself. This complete guide covers materials, step-by-step plans, and expert tips for a professional result.
Jump to MaterialsWhy Build Your Own Monitor Stand?
A DIY monitor stand (or monitor riser) is one of the most practical and satisfying desk projects you can tackle. Not only does it raise your screen to eye level for better ergonomics, but it also frees up valuable desk surface underneath for a keyboard, notepads, or other accessories.
Buying a pre-made stand can cost anywhere from $40 to $150+, but building your own lets you customize the dimensions, finish, and style to perfectly match your desk setup. Plus, you'll gain woodworking skills and a sense of accomplishment every time you sit down to work.
In this guide, we'll walk you through a simple yet sturdy design that even beginners can complete in a weekend. All you need are basic tools and a few hours of focused effort.
Materials & Tools
📦 Materials
- Wood board: 1×12 (or ¾″ plywood) – length depends on your desired stand width (recommend 24″–36″)
- Wood legs: 4×4 or 2×4 cut to height (8″–10″ is typical)
- Wood glue and wood screws (1.5″–2″)
- Sandpaper (120, 220 grit)
- Wood stain or paint (optional)
- Felt pads (to protect desk surface)
🔧 Tools
- Circular saw or miter saw
- Drill / driver
- Measuring tape & square
- Clamps (at least 2)
- Sanding block or orbital sander
- Safety glasses & dust mask
Step-by-Step Build Instructions
Measure & Cut
Decide the width and depth of your stand. A typical monitor stand is 24″ wide and 10″–12″ deep. Cut the top board and four legs to size. If using 2×4 legs, cut four pieces at the desired height (e.g., 9″).
Sand All Pieces
Sand the top board and legs starting with 120-grit, then 220-grit for a smooth finish. Round over the edges slightly for a more polished look and to avoid sharp corners.
Assemble the Frame
Apply wood glue to the top of each leg and position them at the corners of the top board. Clamp and secure with screws from the underside (pre-drill to prevent splitting). Wipe away excess glue.
Finish & Protect
Apply your chosen stain or paint. Let dry completely. For extra protection, add a clear coat of polyurethane. Finally, stick felt pads to the bottom of each leg to avoid scratching your desk.
Customize Your Stand
One of the best parts of a DIY project is the ability to tailor it to your specific needs. Here are some popular variations:
- Add a shelf: Build a lower shelf for a keyboard or tablet. This is a great option for keyboard trays or additional storage.
- Incorporate cable management: Drill a hole in the top board for a desk grommet to route cables cleanly through the stand.
- Use hairpin legs: For a modern industrial look, swap wooden legs for metal hairpin legs (available online). This pairs well with an industrial desk style.
- Paint or stain: Match your desk decor – go for a natural wood finish, a sleek black, or even a pop of color.
If you're feeling adventurous, you can even build a floating desk setup by attaching the stand directly to the wall, but that's a project for another day!
Common Mistakes & How to Avoid Them
- ❌ Legs too tall or too short: Measure your eye level while seated. The stand height should raise the monitor so you look straight ahead, not up or down.
- ❌ Over-tightening screws: This can split the wood. Always pre-drill and use moderate torque.
- ❌ Skipping sanding: A rough surface looks unprofessional and can snag cables or clothes. Sand thoroughly before finishing.
- ❌ Not checking for wobble: Ensure all legs are exactly the same length. Use a level during assembly to guarantee stability.
For more desk-building insights, check out our guide on common desk setup mistakes and how to fix them.
⚠️ AFFILIATE DISCLOSURE: This website contains affiliate links. As an Amazon Associate, we earn from qualifying purchases. If you make a purchase through these links, we may receive a small commission at no additional cost to you. Read our full affiliate policy.
Top Monitor Stands & Risers
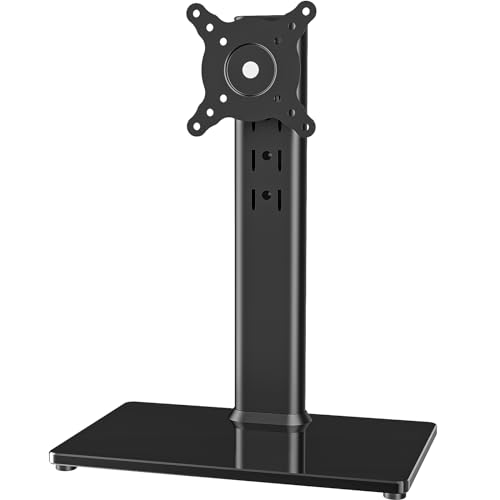
Single LCD Computer Monitor Free-Standing Desk Stand Mount Riser for 13 inch to 32 inch screen with Swivel, Height Adjustable, Rotation, Vesa Base Stand Holds One (1) Screen up to 77Lbs(HT05B-001))

JIWINNER Desk Organizer and Accessories, Computer Monitor Stand for Desk, 31.5" Diy Acrylic Monitor Riser for Desk Accessories
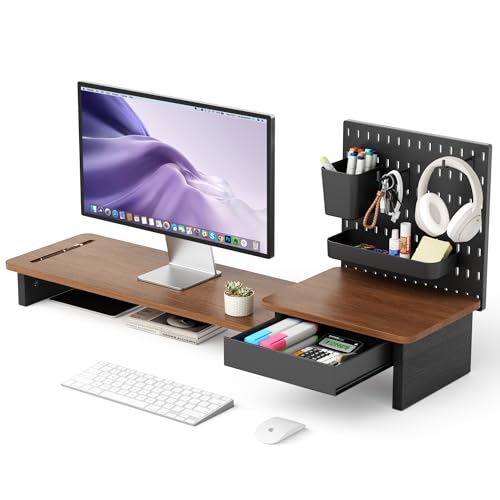
AFOOYO Monitor Stand Riser,Computer Monitor Stand with DIY Pegboard and drawer for Laptop,PC,Computer,Printer,Walnut Finish

EVOOMI Monitor Stand Riser - Upgraded for Faster Productivity - Anti-Skid, HD Hexagonal Steel - Free Cable Ties - Computer Stand - Laptop, Desktop, Printer, iMac (Simple)

Monitor Stand Riser, Klearlook Foldable, Height Adjustable Computer Stand, Desk Shelf Riser with Storage Drawer &Tablet Phone Stand for Desktop, Laptop (White)

Klearlook Computer Monitor Stand for Desk, Adjustable Foldable Monitor Riser with Storage Drawer & Tablet Phone Holder for Office, Home, Laptop, Desktop (Black)

HUANUO Monitor Stand, Freestanding VESA Mount for 13 to 34 Inch Screens, Holds up to 44lbs, 5 Height Options, Swivel Desk Stand Riser With 360 Rotation, VESA 75x75mm/100x100mm

Hemudu 2 Pack Computer Monitor Riser with Height Adjustable Multi Media Desktop Stand for Flat Screen LCD LED TV, Laptop/Notebook/Xbox One
Ready to Build Your Stand?
A DIY monitor stand is a weekend project that delivers daily rewards – better posture, a cleaner desk, and a custom look that reflects your style. Whether you follow our plans or adapt them, you'll enjoy the satisfaction of creating something useful with your own hands.
Don't forget to share your creation with the desk setup community! And if you're looking for more desk projects, explore our guides on DIY desk plans and desk shelves.