How to Repair Desk Scratches – Complete Surface Restoration Guide
From light scuffs to deep gouges — learn proven methods to repair desk scratches on wood, laminate, veneer, and more. Restore your workspace surface like a pro.
JUMP TO REPAIR METHODSAll About Desks — Scratches on your desk surface are inevitable, but they don't have to ruin your workspace. Whether it's a solid oak desk, a walnut desk, or a laminate desk, the right repair technique can make scratches virtually disappear. This guide covers everything from quick fixes for minor scuffs to deep restoration for heavy damage. We'll also help you choose the best desk polish and care products to keep your surface looking pristine.
Understanding Desk Scratches: Types and Causes
Before you start repairing, it helps to identify what you're dealing with. Desk scratches generally fall into three categories:
- Surface Scuffs — Light marks that only affect the top coat or finish. Often caused by papers, light objects, or minor friction.
- Shallow Scratches — Penetrate the finish but not the wood or material itself. Common from sliding items like phone stands or laptop stands.
- Deep Gouges — Actual cuts into the wood, veneer, or laminate. Usually from heavy objects, dropped tools, or accidental impacts.
The repair method you choose depends on the depth of the scratch and your desk material. A glass desk requires different care than a bamboo desk, so always check your desk's material before starting.
Quick Guide: Scratch Repair by Material
| Desk Material | Best Repair Method | Recommended Product Type |
|---|---|---|
| Oak / Walnut / Cherry | Wax stick or stain marker | Wood repair wax or touch-up pen |
| Laminate | Laminate repair paste or polish | Laminate scratch remover |
| Veneer | Fine touch-up marker + gentle buff | Veneer repair kit |
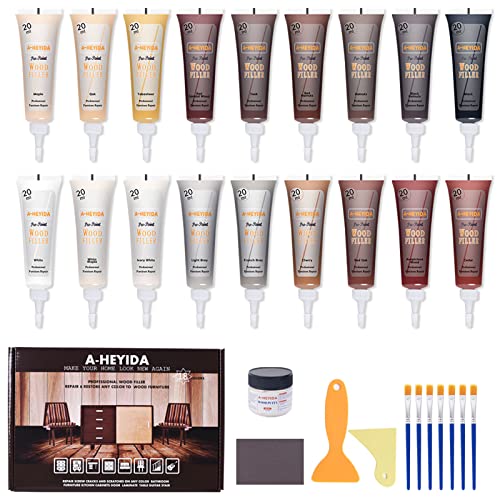
| Plywood / MDF | Wood filler + sanding + refinish | Wood filler + matching stain |
| Glass | Glass polish or cerium oxide | Glass scratch remover kit |
Step-by-Step Desk Scratch Repair Methods
🟢 Method 1: For Light Scuffs
Best for: Minor surface marks on finished wood, laminate, or veneer.
You'll Need:
- Soft microfiber cloth
- Mineral spirits or gentle wood cleaner
- Desk polish or wax (optional)
Steps:
- Clean the area gently with a soft cloth and a small amount of mineral spirits.
- Dry thoroughly with a clean cloth.
- Buff the surface with a quality desk polish to restore shine.
- For stubborn scuffs, use a small amount of baking soda mixed with water to form a paste, gently rub, then wipe clean.
🟡 Method 2: Shallow Scratches (Finish Only)
Best for: Scratches that haven't reached the wood or substrate.
You'll Need:
- Wood touch-up marker or wax stick (match your desk color)
- Soft cloth
- Fine steel wool (0000) or superfine sandpaper
Steps:
- Select a touch-up marker or wax stick that matches your desk's finish. For walnut desks, choose a rich dark brown; for maple desks, a lighter tone.
- Apply the product along the scratch line. Let it sit for 1–2 minutes.
- Buff gently with a soft cloth to blend.
- If the scratch is still visible, repeat and lightly buff with fine steel wool, then polish.
🔴 Method 3: Deep Gouges (Into the Material)
Best for: Deep scratches that cut into wood, veneer, or laminate.
You'll Need:
- Wood filler or epoxy putty
- Putty knife
- Sandpaper (fine to superfine)
- Stain or sealant matching your desk
Steps:
- Clean the gouge thoroughly with a damp cloth and let dry.
- Apply wood filler with a putty knife, slightly overfilling the scratch.
- Let dry completely (follow product instructions).
- Sand gently with fine-grit sandpaper until smooth and flush with the surface.
- Apply matching stain or sealant. For reclaimed wood desks, use a stain that complements the rustic character.
- Finish with a protective coat of polyurethane or wax.
🔵 Method 4: Specialty Materials (Glass, Metal, Concrete)
Best for: Non-wood surfaces like glass, metal, or concrete desks.
You'll Need:
- Glass scratch remover kit (for glass desks)
- Metal polish and fine abrasive pad (for metal desks)
- Concrete patch and sealer (for concrete desks)
Steps (Glass):
- Apply cerium oxide paste to the scratch.
- Use a felt pad or rotary tool to buff in small circles.
- Wipe clean and inspect; repeat if necessary.
Steps (Metal & Concrete):
- For metal desks, use a fine abrasive pad with metal polish to buff out scratches.
- For concrete desks, apply a concrete patching compound, sand smooth, and seal.
Prevention & Aftercare
Once you've repaired your desk, protecting it from future damage is key. Here are some essential tips:
- Use a desk mat — A high-quality desk mat or blotter protects the surface from daily wear and tear.
- Regular cleaning — Dust and dirt can act like sandpaper. Wipe your desk daily with a soft, dry cloth.
- Avoid direct sunlight — UV rays can fade and weaken finishes, making them more prone to scratching.
- Use coasters and pads — Place felt pads under heavy items like monitor stands or monitor stands with storage.
- Periodic polishing — A regular desk polishing routine keeps the finish resilient and beautiful.
When to Refinish Instead of Repair
Not all scratches can be spot-repaired. If your desk has extensive damage, widespread dullness, or multiple deep gouges, it might be time for a full desk refinish. Refinishing involves stripping the old finish, sanding the entire surface, and applying a new coat of stain and sealant. This is a more labor-intensive process but can make an old desk look brand new. For DIY enthusiasts, refinishing is a rewarding project. If you're unsure, consult a professional.
Ready to Restore Your Desk Surface?
Shop the best scratch repair kits, polishes, and protective mats recommended by our experts.
VIEW REPAIR PRODUCTS LEARN DESK CLEANING