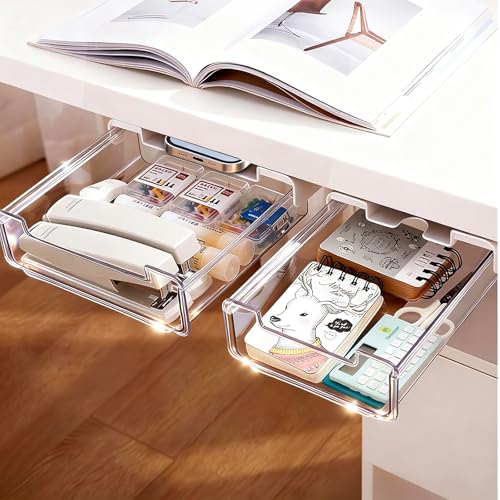
Adding a Drawer to a Desk – Step-by-Step DIY Guide
Transform your workspace with a custom drawer. Learn how to add a drawer to your desk, from choosing slides to the final installation. All about desks made better!
Why Add a Drawer? A drawer transforms a simple desk into an organized workspace. Whether you need to store office supplies, gadgets, or personal items, adding a drawer is a practical DIY project that boosts both function and value.
What You Need to Know Before Adding a Drawer
Adding a drawer to a desk is a rewarding project, but it requires planning. You'll need to consider the desk's construction, the drawer size, and the type of slides. This guide covers the entire process, from assessing your desk to the final touches.
Before you start, assess your desk. Is it solid wood, MDF, or veneer? The material affects how you'll attach the drawer slides. Also, measure the available space carefully. Remember, you can always consult our guide on desks with file drawers and hutches for inspiration on integrated storage solutions. For those with smaller desks, our small desk with lots of storage article offers alternative organization ideas.
Choosing the Right Drawer Slides
The heart of your drawer is the slide mechanism. The right slides ensure smooth operation and durability. Here are the most common types:
- Roller Slides: Budget-friendly and easy to install. They are side-mounted and work well for light to medium loads. They offer a classic, reliable option for most DIY projects.
- Ball-Bearing Slides: These are the gold standard for smooth, quiet operation. They are more durable and can handle heavier loads. They come in side-mount and under-mount varieties and are perfect for drawers that will see daily use.
- Under-Mount Slides: These are hidden beneath the drawer, providing a clean, unobstructed look. They are typically more expensive and require precise installation but offer a premium feel.
For most home office desks, ball-bearing side-mount slides offer the best balance of cost and performance. They are widely available and relatively easy to install. If you're working with a desk that has an existing opening, you might want to consider a desk with adjustable height and drawers for a more seamless upgrade.
Step-by-Step Installation Guide
Follow these steps to add a drawer to your desk successfully. This process assumes you're building a new drawer for an existing opening or creating a new opening in your desk.
- Measure and Plan: Measure the opening where the drawer will go. Determine the drawer box dimensions, accounting for the slides. A typical drawer is 1 inch smaller in width and 1/2 inch smaller in height than the opening to allow for smooth movement.
- Build or Buy the Drawer Box: You can build a simple drawer box using plywood or medium-density fiberboard (MDF). The box consists of a front, back, two sides, and a bottom. Alternatively, you can purchase a pre-made drawer box online or from a hardware store.
- Attach the Slides to the Drawer Box: Follow the manufacturer's instructions to attach the slide members to the sides of the drawer box. Ensure they are level and parallel. Use a square to verify alignment.
- Attach the Slides to the Desk: This is the critical step. Place the drawer box into the opening and mark the position of the slides on the desk's interior. Attach the slide members to the desk using screws. Use a level to ensure they are perfectly straight.
- Install the Drawer Front: The drawer front is the visible part. You can use the same wood as your desk or opt for a contrasting material for a unique look. Attach it to the drawer box using screws or wood glue. Adjust it so the gaps are even all around.
- Test and Adjust: Gently slide the drawer in and out. It should move smoothly without sticking. If it's too tight or loose, adjust the slides or the drawer box as needed.
For those who prefer a more straightforward solution, consider purchasing a desk that already has drawers. Our guide on wood home office desks with drawers can help you find the perfect ready-made option.
Tools and Materials Checklist
Before you begin, gather these essential tools and materials:
- Materials: Drawer slides, screws, wood glue, plywood or MDF for the drawer box, wood for the drawer front.
- Tools: Tape measure, screwdriver (or drill with bits), level, square, clamps, and a saw (if building from scratch).
For an ergonomic setup, consider pairing your new drawer with a keyboard tray under the desk to free up even more surface space.
Pros and Cons of Adding a Drawer
✅ Pros
- Increased Organization: Keeps small items like pens, chargers, and papers neatly stored away.
- Improved Aesthetics: A custom drawer can enhance the look of your desk.
- Cost-Effective: Often cheaper than buying a new desk with built-in drawers.
- DIY Satisfaction: A rewarding project that adds personal value to your workspace.
❌ Cons
- Time-Consuming: Requires careful planning and several hours of work.
- Skill Required: Basic woodworking and measuring skills are necessary.
- Risk of Mistakes: Incorrect measurements can ruin the drawer or the desk.
- Limited Space: May not be possible for all desk designs or sizes.
Maintenance Tips
To keep your new drawer working smoothly for years, follow these simple maintenance tips:
- Clean Regularly: Vacuum or wipe the drawer and slides to remove dust and debris.
- Lubricate Slides: Apply a dry lubricant or a small amount of silicone spray to the slides every 6-12 months.
- Check Screws: Periodically check that all screws are tight. Loose screws can cause the drawer to wobble.
For a comprehensive workspace upgrade, you might also be interested in our guides on desk organizers and comfortable desk chairs to complete your setup.
Ready to Start Your Drawer Project?
Get all the supplies you need from our recommended products below. Everything from drawer slides to pre-made drawer boxes is just a click away.
Shop Drawer Supplies Now