DIY Standing Desk: Build Your Perfect Custom Workstation
Create a professional-grade sit-stand desk tailored to your needs. Save money, get the exact size and finish you want, and enjoy the health benefits of an ergonomic workspace.
VIEW DIY PLANSWhy Build Your Own Standing Desk?
Building your own DIY standing desk gives you complete control over your workspace. You can choose the exact dimensions, select premium materials, and customize the finish to match your office decor. Plus, you'll save hundreds of dollars compared to buying a pre-built electric standing desk or ergonomic standing desk from a retail store.
Whether you're looking for a compact small standing desk for a tight space or a spacious corner standing desk for a dual-monitor setup, a DIY approach lets you build exactly what you need. This comprehensive guide covers everything from selecting the right desk frames and desk tops to assembly and finishing techniques.
Benefits of a DIY Standing Desk
Cost Savings
Save 40-60% compared to premium standing desk brands
Custom Dimensions
Build any size to fit your space perfectly
Material Choice
Select from oak, walnut, bamboo, or custom laminates
Durability
Commercial-grade components that last for years
Essential Materials for Your DIY Standing Desk
Before starting your DIY standing desk project, gather these essential components. The quality of your materials directly impacts the stability, durability, and overall experience of your electric adjustable standing desk build.
Frame ($250–$450) + Top ($150–$300) + Finish ($30–$50)
Step-by-Step DIY Standing Desk Guide
Follow these detailed steps to build your own DIY standing desk. This process works for both electric standing desks and manual standing desks, giving you flexibility based on your budget and preference.
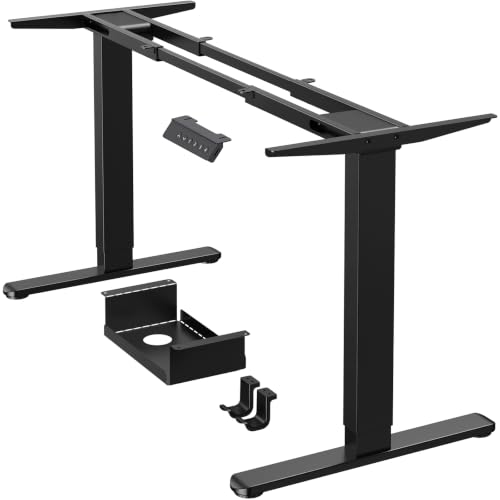
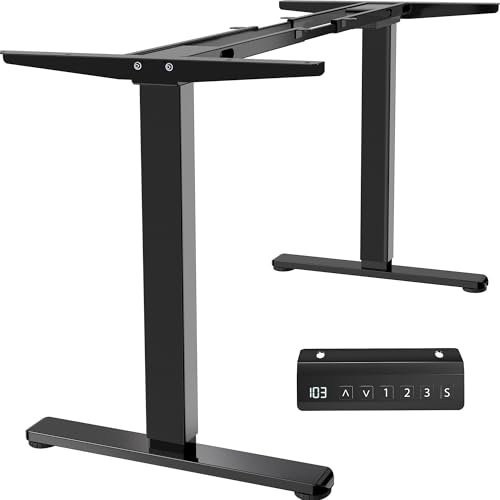
1 Choose Your Desk Frame
Select a desk frame that supports your weight capacity and height requirements. For a DIY standing desk, consider:
- Electric frames: Convenient, but more expensive. Great for electric adjustable desk projects.
- Manual frames: Cost-effective and reliable. Perfect for manual standing desk builds.
- Height range: Ensure it reaches your ergonomic sitting and standing heights.
- Weight capacity: Account for monitors, laptop, and accessories.
2 Select Your Desk Top
The desk top defines your workspace surface. Popular options include:
- Butcher block: Durable, affordable, and easy to finish.
- Oak: Classic, strong, and beautiful grain.
- Walnut: Premium dark wood with rich character.
- Bamboo: Eco-friendly, lightweight, and modern.
- Plywood: Budget-friendly, requires edge banding or finishing.
3 Cut and Finish Your Top
Shape and treat your desk top for a professional finish:
- Cut to your desired dimensions using a circular saw or table saw.
- Sand thoroughly with 120, 180, and 220-grit sandpaper.
- Apply your chosen desk finish (polyurethane, Danish oil, or wax).
- Allow at least 24-48 hours drying time before assembly.
4 Assemble the Frame
Follow the manufacturer's instructions for your desk frame assembly:
- Lay out all components and hardware.
- Attach legs to the crossbar or mounting plate.
- Secure all bolts with the included tools.
- Test the height adjustment mechanism before mounting.
5 Mount the Desk Top
Attach your finished top to the desk frame:
- Position the frame upside down on the top.
- Drill pilot holes to prevent wood splitting.
- Use wood screws with washers for secure mounting.
- Consider using threaded inserts for easier future disassembly.
6 Add Cable Management
Keep your DIY standing desk organized with effective under desk cable management:
- Install a cable tray under the desk top.
- Use cable clips and sleeves to bundle wires.
- Plan power strip placement for easy access.
- Test cable slack at both sitting and standing heights.
Expert DIY Standing Desk Tips
💡 Choose the Right Height Range
For a DIY standing desk, ensure your frame covers your ideal sitting and standing heights. Most users need a range of 22"–48". If you're taller, opt for a 3-stage frame for extra height.
💡 Test Stability Before Final Assembly
Before mounting the desk top, test the desk frame at full height. Ensure it doesn't wobble and that the adjustment mechanism works smoothly. A stable base is crucial for an ergonomic desk experience.
💡 Add a Monitor Arm for Flexibility
Pair your DIY standing desk with a monitor arm for complete ergonomic adjustment. This allows you to position your screen at the perfect height and distance for both sitting and standing positions.
💡 Plan for Future Upgrades
Build your DIY standing desk with expandability in mind. Consider adding desk drawers or desk hutches later. Leave space for accessories like monitor light bars or footrests.
Common DIY Standing Desk Mistakes to Avoid
Avoid these pitfalls when building your DIY standing desk for a successful project:
-
❌ Choosing the Wrong Frame Size
Always check the frame's height range and weight capacity against your needs before purchasing.
-
❌ Skipping Pilot Holes
Drilling without pilot holes can split your desk top. Always pre-drill for screws.
-
❌ Insufficient Cable Slack
Leave extra cable length for the full height range of your electric adjustable standing desk.
-
❌ Not Leveling the Desk
Use the adjustable feet on your desk frame to ensure the desk is level on uneven floors.
Ready to Build Your DIY Standing Desk?
Building your own DIY standing desk is a rewarding project that delivers a custom, ergonomic workspace tailored to your needs. With the right desk frame and desk top, you can create a professional-grade electric standing desk or manual standing desk at a fraction of the retail cost.
Ready to start? Explore our recommended desk frames and desk tops below to kickstart your DIY standing desk project. For more inspiration, check out our custom desk ideas